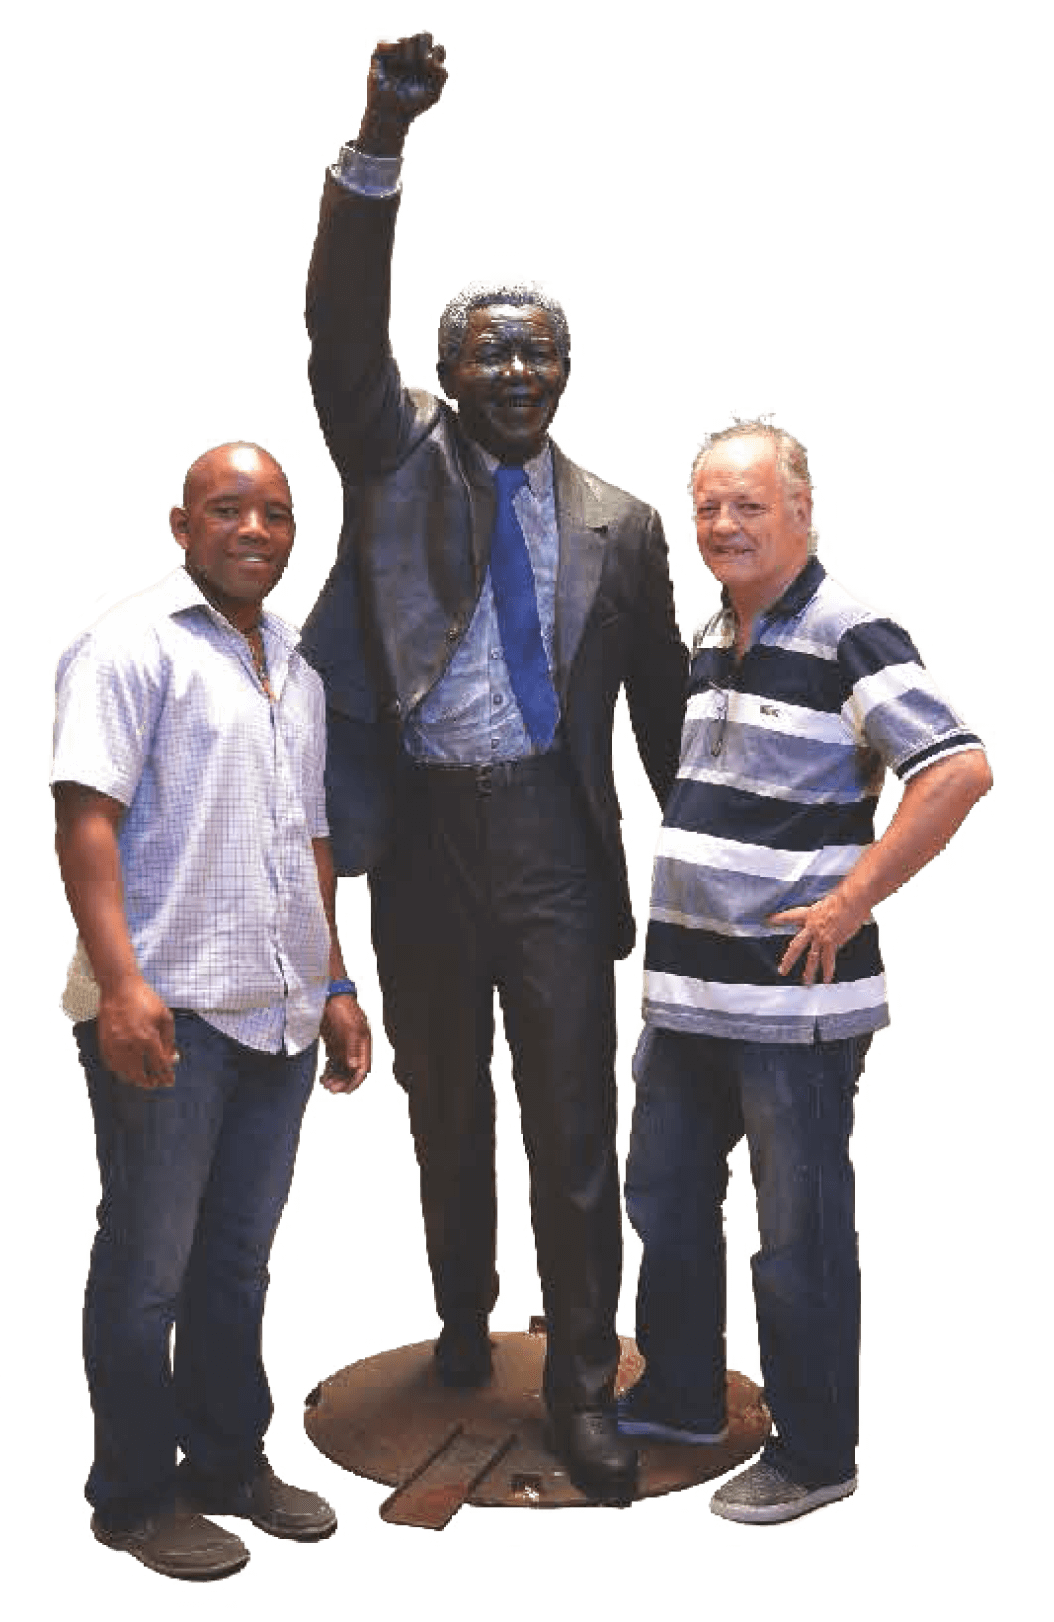
LONG MARCH TO FREEDOM
100 AMAZING ARTWORKS – ONE INCREDIBLE JOURNEY
THE LONG MARCH TO FREEDOM ARTISTS
LONG MARCH TO FREEDOM IMAGES
These images may be used for non-commercial purposes together with the following credit: National Heritage Project NPC / Long March to Freedom. For commercial or other use please contact the National Heritage Project NPC on info@longmarchtofreedom.co.za.
THE LONG MARCH TO FREEDOM
The Making of a Bronze
The following is the step-by-step summary of the `Lost Wax` method of casting (also known as `cire-perdue`) employed to make the bronzes exhibited here. Objects have been cast using this method for more than 5 000 years, and although techniques and materials have changed, much of the process has remained the same. The `Lost Wax` method is time-consuming and requires the sculpture to be cast twice, once in wax and then again in metal, but it has stood the test of time because it is extremely accurate in replicating the detail of the artists' original creation and results in an artwork that will last for many generations.
A large team of highly skilled artists and artisans work on a bronze created with this method.
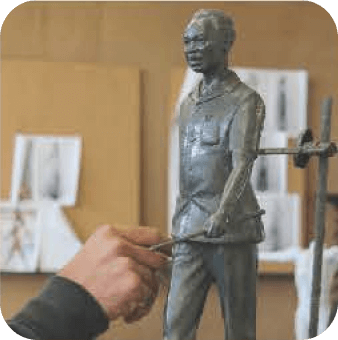
STEP 1
MAKING OF A MAQUETTE:
The artist makes a small model (maquette) as a 'statement of intent' according to the project brief. He indicates stance, clothing and any interesting items the figure could be carrying.
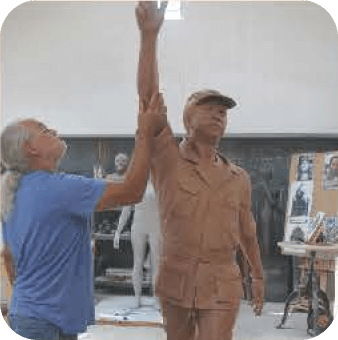
STEP 2
LIFE-SIZE CLAY MODEL:
Once the maquette is signed off, the artist then makes a detailed life-size version of the final piece in clay, plasticine or plaster.
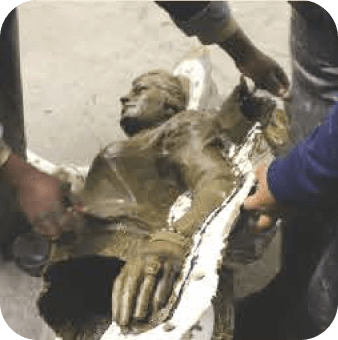
STEP 3
MAKING THE FIRST MOULD:
A rubber material followed by a supporting layer of plaster are applied over the clay model to create a perfect imprint of the original. A critical step, as all the detail of the sculpture must be captured in this first mould. When the plaster is set, the mould is peeled from the original work in pieces.
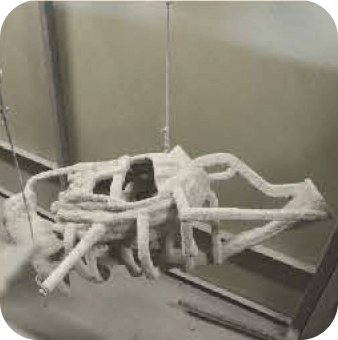
STEP 4
MAKING THE WAX CASTING:
Layers of molten wax are brushed onto the pieces of rubber mould. The hardened wax is then pulled from the moulds and checked for any imperfections, which are corrected. The result is a perfect wax copy of the original clay figure, only in pieces. Wax rods and a pouring cup are then attached to each wax casting in just the right positions to allow for liquid bronze to be poured in later.
STEP 5
MAKING THE CEREMIC MOULD:
The wax casting is then dipped into ceramic sand. This step is repeated several times, each increasing the coarseness of the material to create the ceramic mould that will eventually hold the bronze.
STEP 6
LOSING THE WAX:
The ceramic shell is placed in a kiln and fired. The shell bakes and the wax is melted (lost) from the shell, giving this method its name of 'The Lost Wax Method'. The result is a hollow cera mic shell which is placed in a sandbed in preparation for the bronze casting.
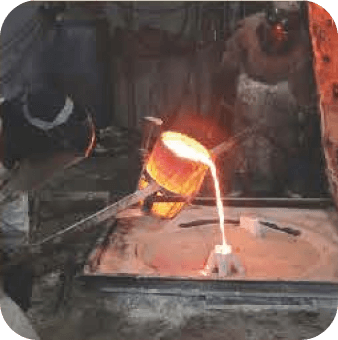
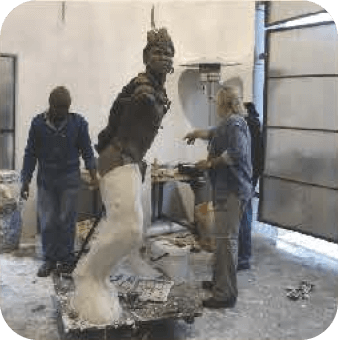
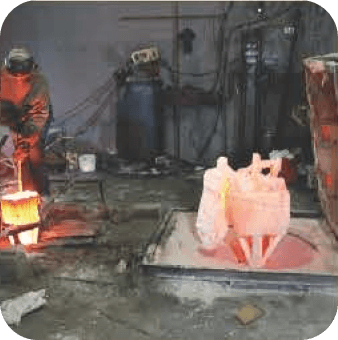
STEP 7
CASTING:
The hollow ceramic shell is now a mould into which the molten bronze is poured at almost 1 200 degrees Celsius. The ceramic moulds are then sunken into the sandbed to help cool the bronze down.
STEP 8
BRONZE IS FREED:
After the bronze casting has cooled over several hours, the shell is carefully chiselled away, revealing the unfinished bronze, still in pieces.
STEP 9
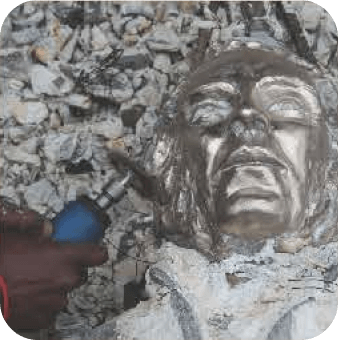
SANDBLASTING / ASSEMBLY:
Any fragments of the ceramic shell are removed through sandblasting. All the bronze pieces of the sculpture are welded together and all the weld marks filed down. Similarly to sandblasting, extremely fine glass beads are used to create an even bronze finish.
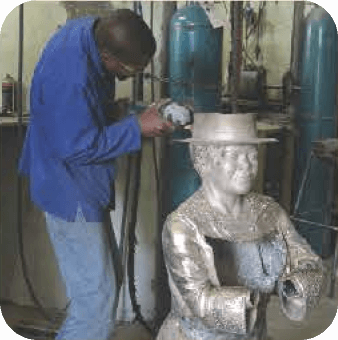
STEP 10
POLISH:
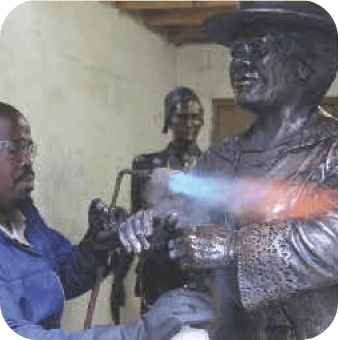
The raw bronze sculpture is now hand polished in preparation for the patina, a thin layer that forms on the surface of the bronze due to natural oxidation or other artificially manipulated chemical processes that produce colour on a bronze.